Arduino Project 010 - Serial Controlled Mood Lamp
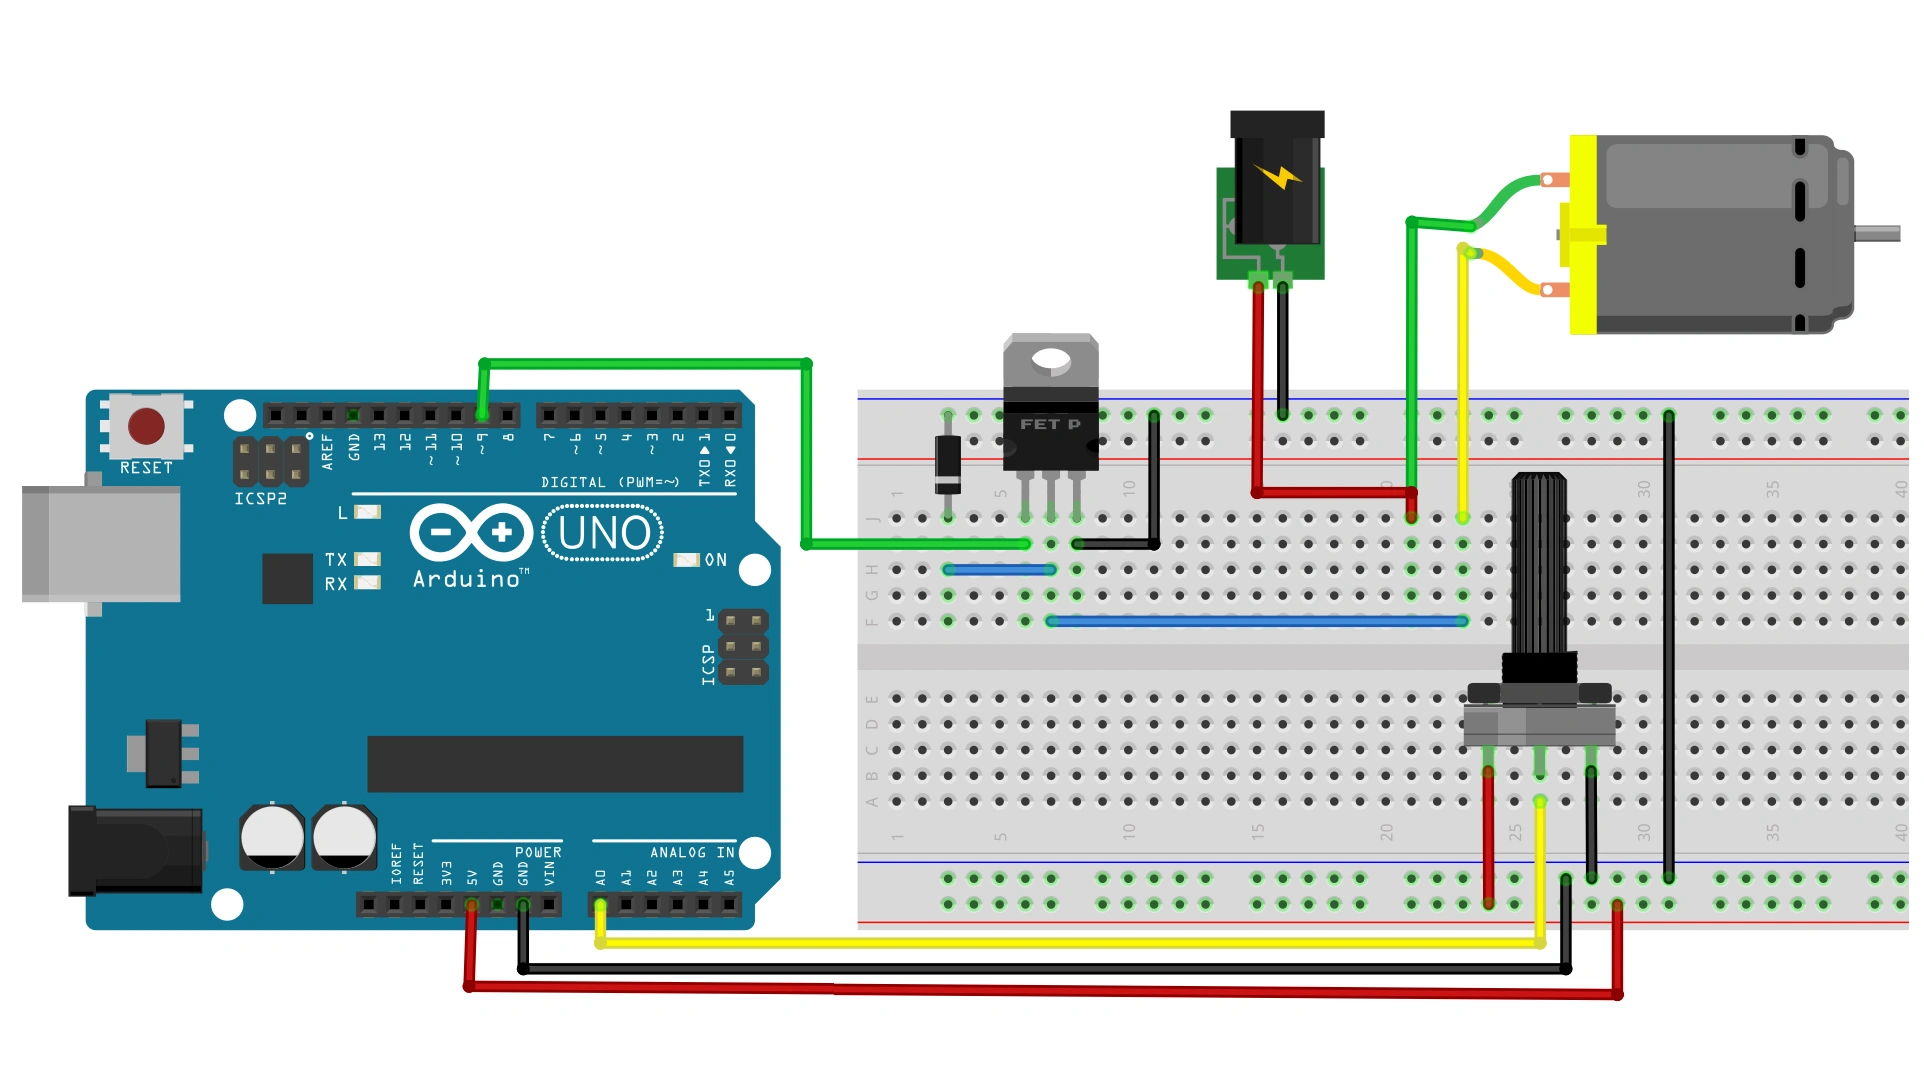
For Project 10, you will revisit the circuit from Project 8 — RGB Mood Lamp, but you’ll now delve into the world of serial communications. You’ll control your lamp by sending commands from the PC to the Arduino using the Serial Monitor in the Arduino IDE. Serial communication is the process of sending data one bit at a time across a communication link.
This project also introduces how to manipulate text strings. So, set up the hardware as you did in Project 8 and enter the new code.
项目10 Serial Controlled Mood Lamp

/* Coding Ron Wang
   July 23rd 2024
   Autaba support for coding hardware
 */
// Project 10 - Serial controlled mood lamp
char buffer[18];
int red, green, blue;
int RedPin = 11;
int GreenPin = 10;
int BluePin = 9;
void setup()
{
 Serial.begin(9600);
 Serial.flush();
 pinMode(RedPin, OUTPUT);
 pinMode(GreenPin, OUTPUT);
 pinMode(BluePin, OUTPUT);
}
void loop()
{
 if (Serial.available() > 0) {
 int index=0;
 delay(100); // let the buffer fill up
 int numChar = Serial.available();
 if (numChar>15) {
 numChar=15;
 }
 while (numChar--) {
 buffer[index++] = Serial.read();
 }
 splitString(buffer);
 }
}
void splitString(char* data) {
 Serial.print("Data entered: ");
 Serial.println(data);
 char* parameter;
 parameter = strtok (data, " ,");
 while (parameter != NULL) {
 setLED(parameter);
 parameter = strtok (NULL, " ,");
}
 // Clear the text and serial buffers
 for (int x=0; x<16; x++) {
 buffer[x]='\0';
 }
 Serial.flush();
}
void setLED(char* data) {
 if ((data[0] == 'r') || (data[0] == 'R')) {
 int Ans = strtol(data+1, NULL, 10);
 Ans = constrain(Ans,0,255);
 analogWrite(RedPin, Ans);
 Serial.print("Red is set to: ");
 Serial.println(Ans);
 }
 if ((data[0] == 'g') || (data[0] == 'G')) {
 int Ans = strtol(data+1, NULL, 10);
 Ans = constrain(Ans,0,255);
 analogWrite(GreenPin, Ans);
 Serial.print("Green is set to: ");
 Serial.println(Ans);
 }
 if ((data[0] == 'b') || (data[0] == 'B')) {
 int Ans = strtol(data+1, NULL, 10);
 Ans = constrain(Ans,0,255);
 analogWrite(BluePin, Ans);
 Serial.print("Blue is set to: ");
 Serial.println(Ans);
 }
} 版权声明:本文为原创文章,版权归donstudio所有,欢迎分享本文,转载请保留出处!