Arduino Project 023C - Liquid Crystal Displays - Serial to Display
Before wiring the LCD screen to your Arduino board we suggest to solder a pin header strip to the 14 (or 16) pin count connector of the LCD screen, as you can see in the image further up.
To start with, you will create a demonstration project that will show off most of the functions available in the LiquidCrystal.h library. To do so, you’ll use a backlit 16x2 LCD Display.
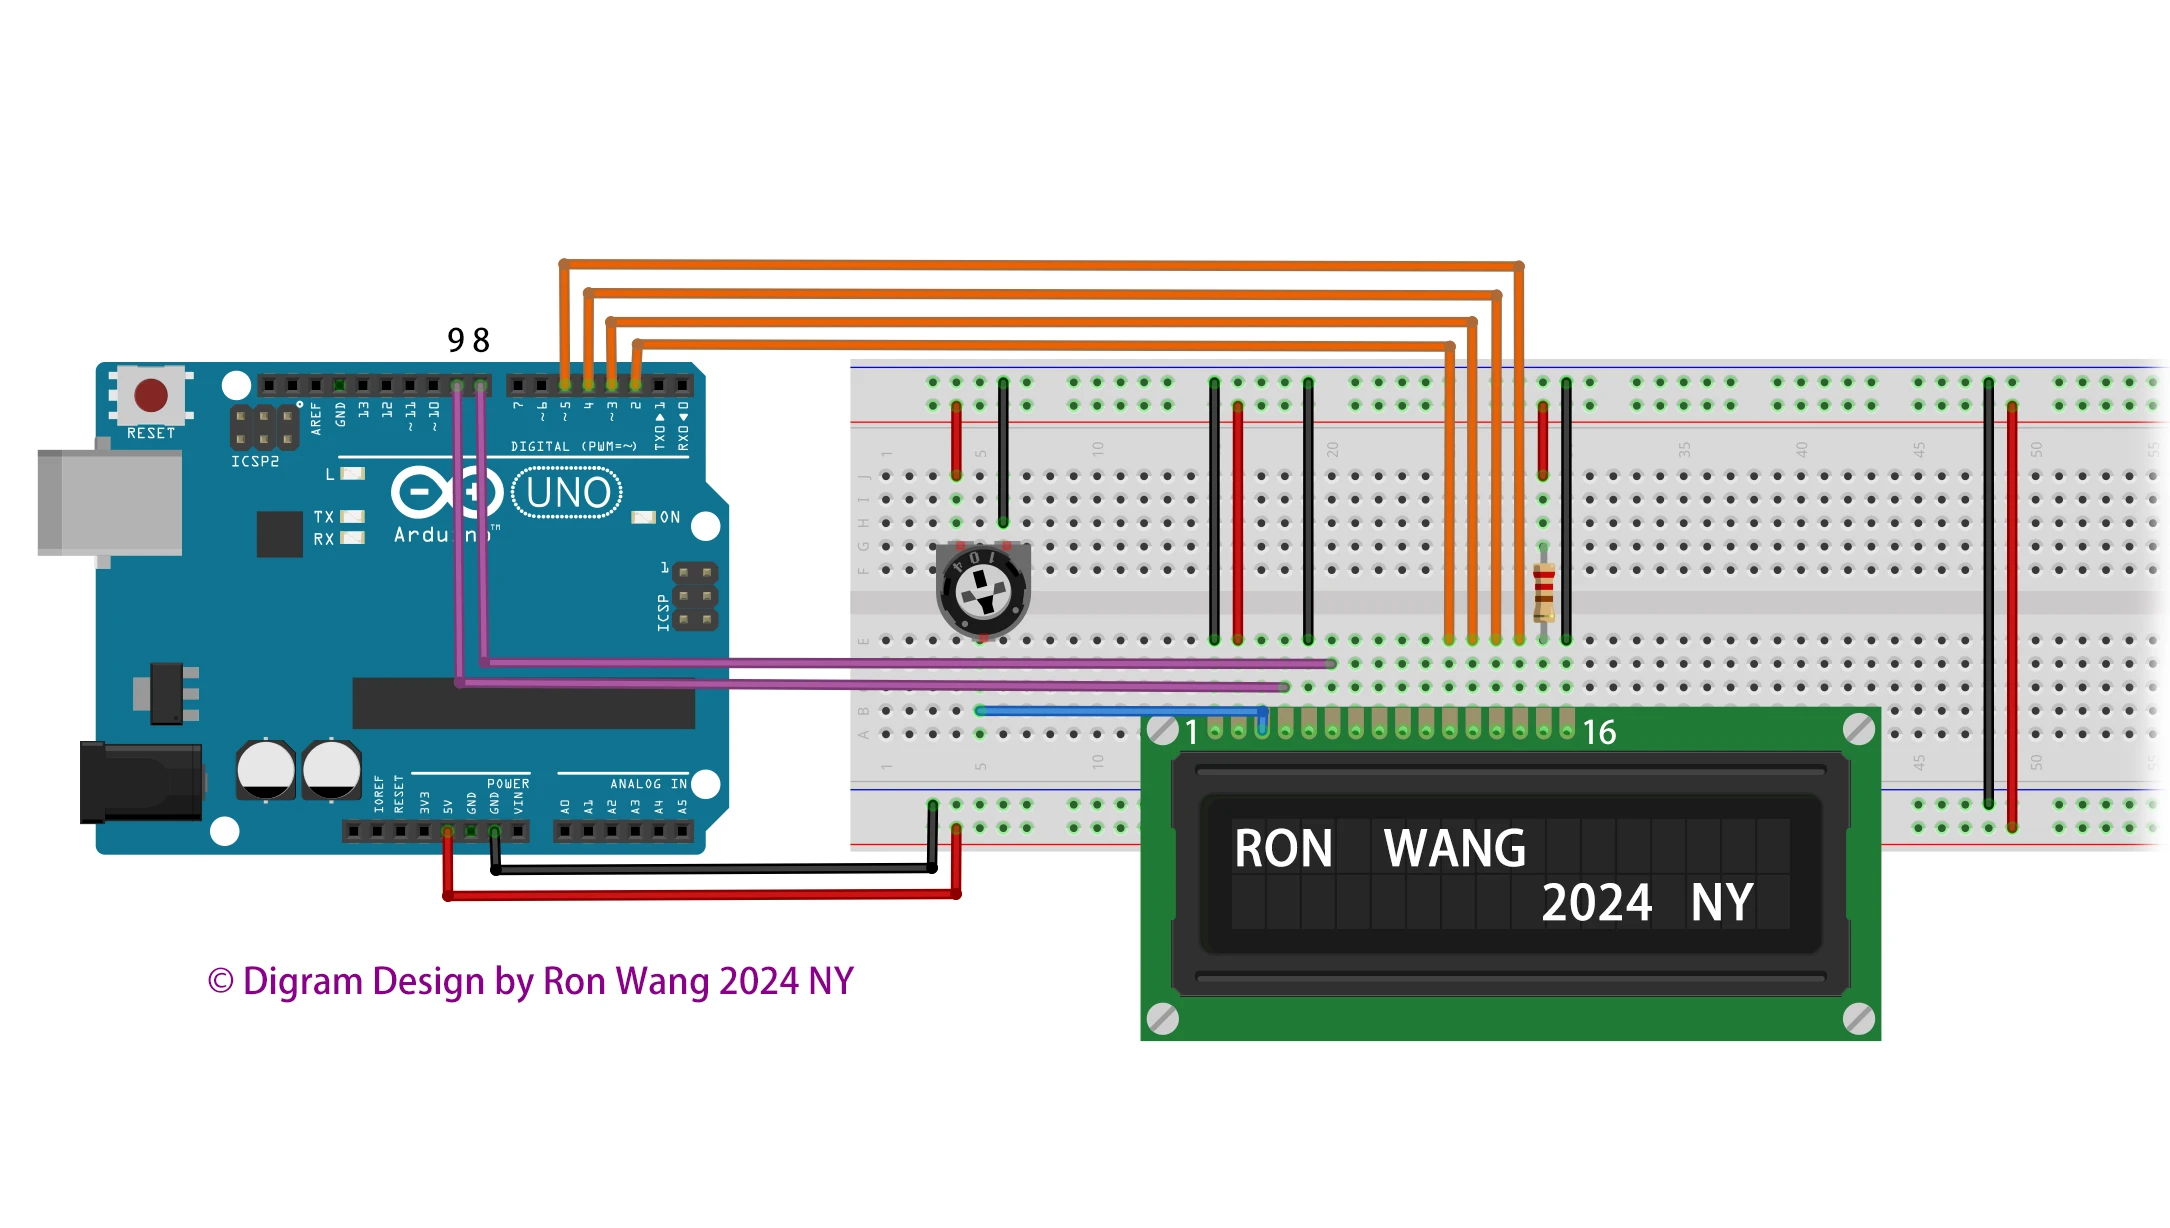
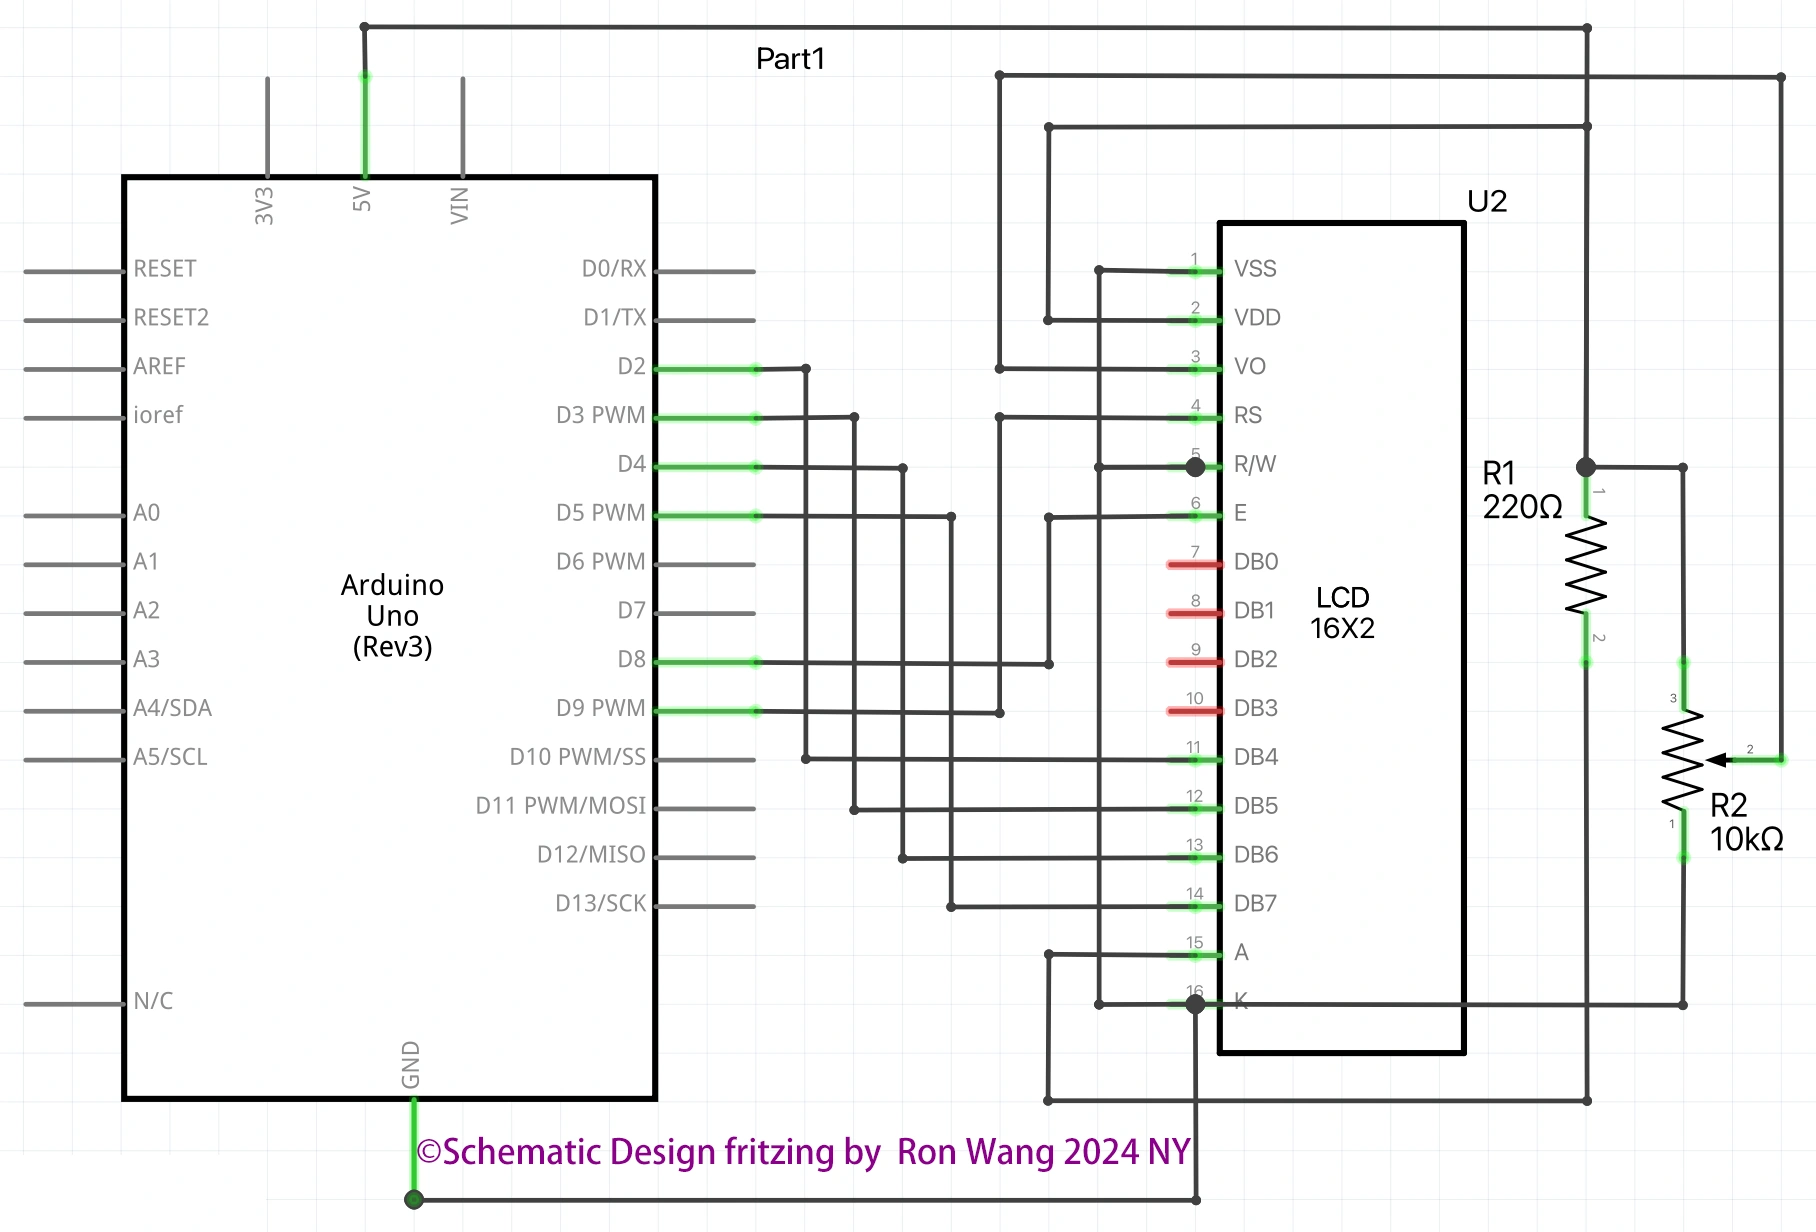
To wire your LCD screen to your board, connect the following pins:
LCD RS pin to digital pin 9
LCD Enable pin to digital pin 8
LCD D4 pin to digital pin 5
LCD D5 pin to digital pin 4
LCD D6 pin to digital pin 3
LCD D7 pin to digital pin 2
LCD R/W pin to GND
LCD VSS pin to GND
LCD VCC pin to 5V
LCD LED+ to 5V through a 220 ohm resistor
LCD LED- to GND
Project 23C Liquid Crystal Displays - Serial to Display
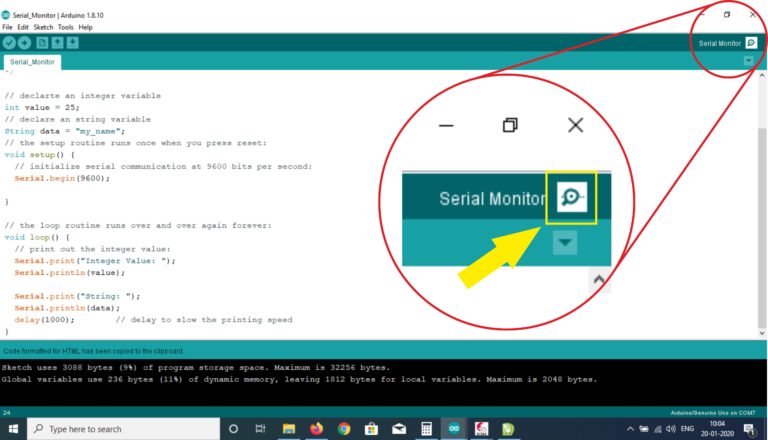
This example sketch accepts serial input from a host computer and displays it on the LCD. To use it, upload the sketch, then open the Serial Monitor and type some characters and click Send. The text will appear on your LCD.
/* Coding Ron Wang
   Nov.12th 2024
   Autaba support for coding hardware
   Project 23D  Basic LCD Control - Serial to Display
 */

#include <LiquidCrystal.h>
// Initialize the library with the numbers of the interface pins
const int rs = 9, en = 8, d4 = 5, d5 = 4, d6 = 3, d7 = 2;
LiquidCrystal lcd(rs, en, d4, d5, d6, d7);
void setup() {
  // set up the LCD's number of columns and rows:
  lcd.begin(16, 2);
  // initialize the serial communications:
  Serial.begin(9600);
}
void loop() {
  // when characters arrive over the serial port...
  if (Serial.available()) {
    // wait a bit for the entire message to arrive
    delay(100);
    // clear the screen
    lcd.clear();
    // read all the available characters
    while (Serial.available() > 0) {
      // display each character to the LCD
      lcd.write(Serial.read());
    }
  }
}
Additionally, wire a 10k potentiometer to +5V and GND, with it's wiper (output) to LCD screens VO pin (pin3).
版权声明:本文为原创文章,版权归donstudio所有,欢迎分享本文,转载请保留出处!


