Arduino Project 008 - RGB LED Mood Lamp
In the last project, you learned how to adjust the brightness of an LED using the PWM capabilities of the Atmega chip. You’ll now take advantage of this capability by using a red, green, and blue LED and mixing these colors to create any color you wish. From that, you’ll create a mood lamp similar to those seen in stores nowadays.
项目8 RGB Mood Lamp
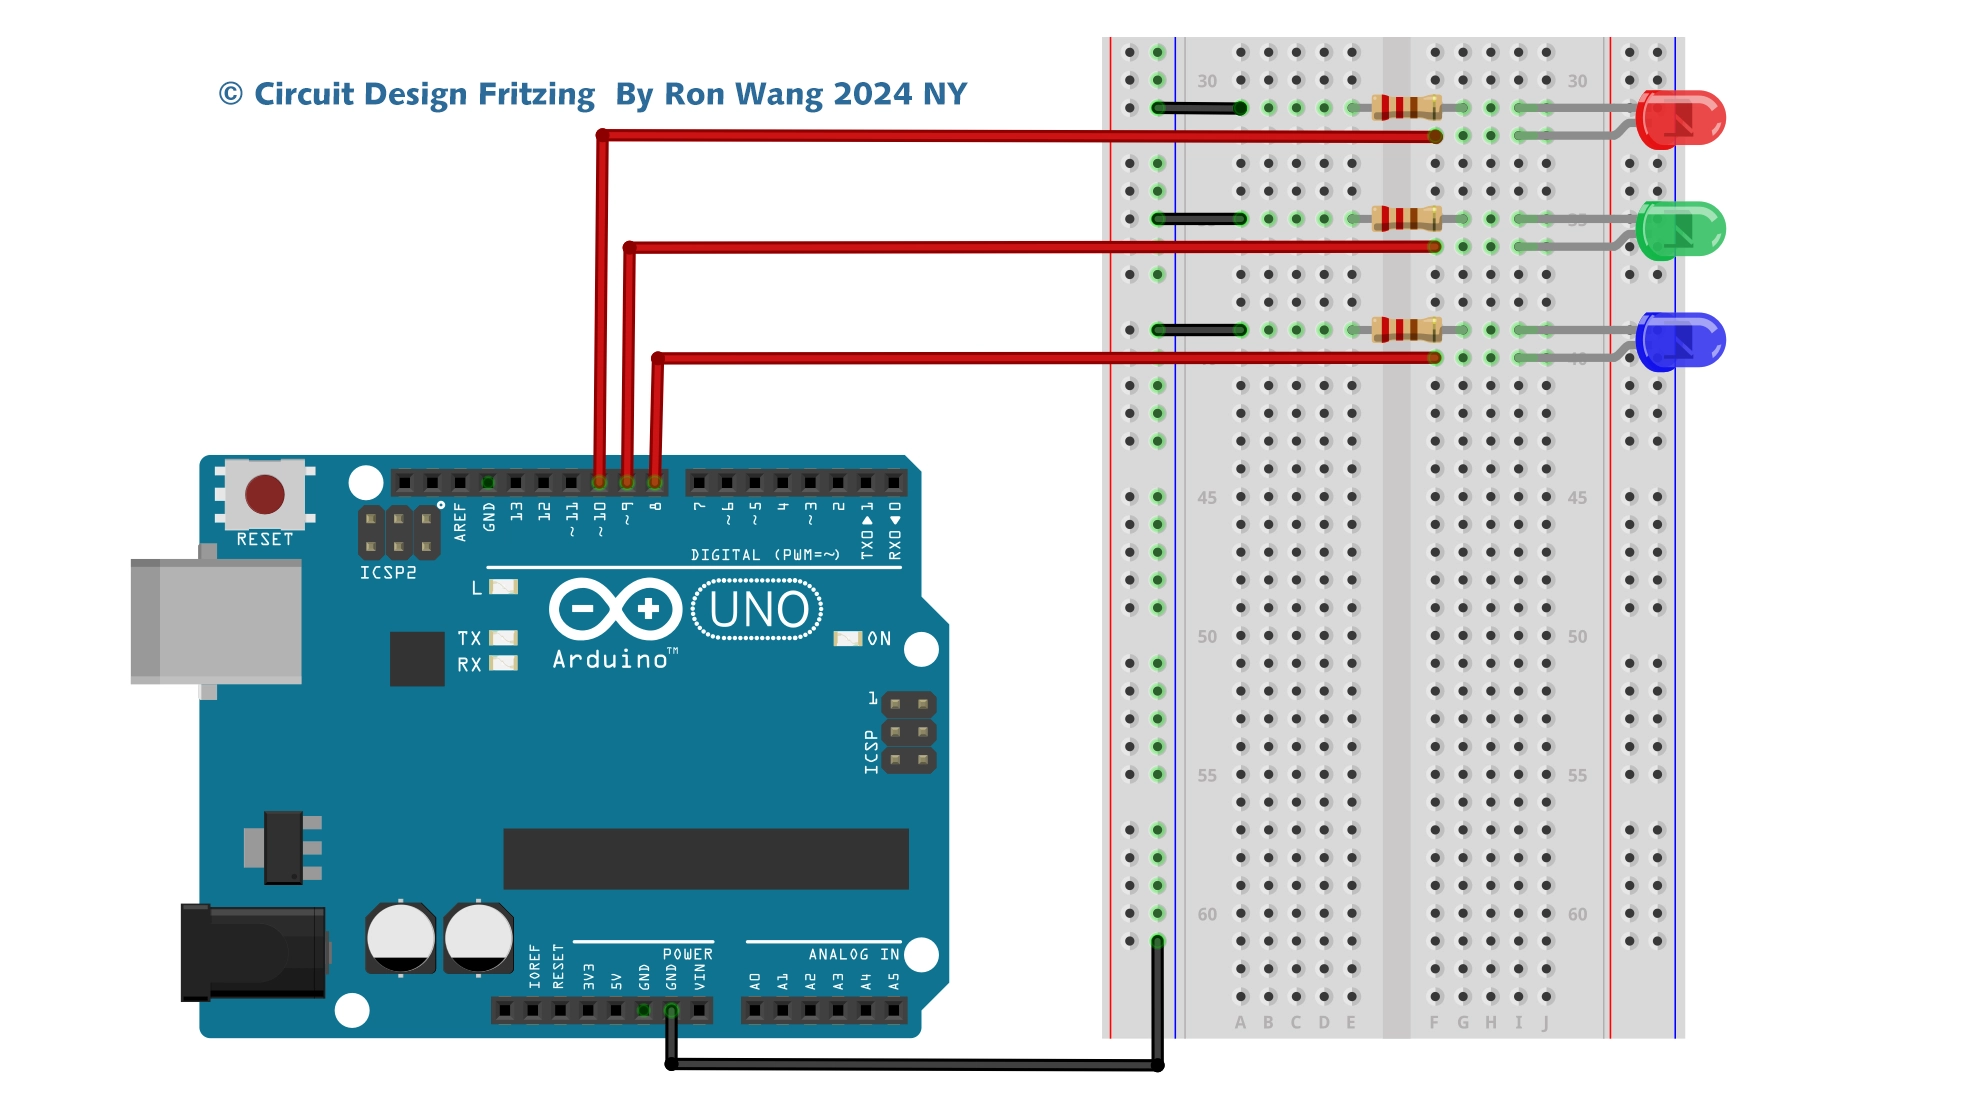
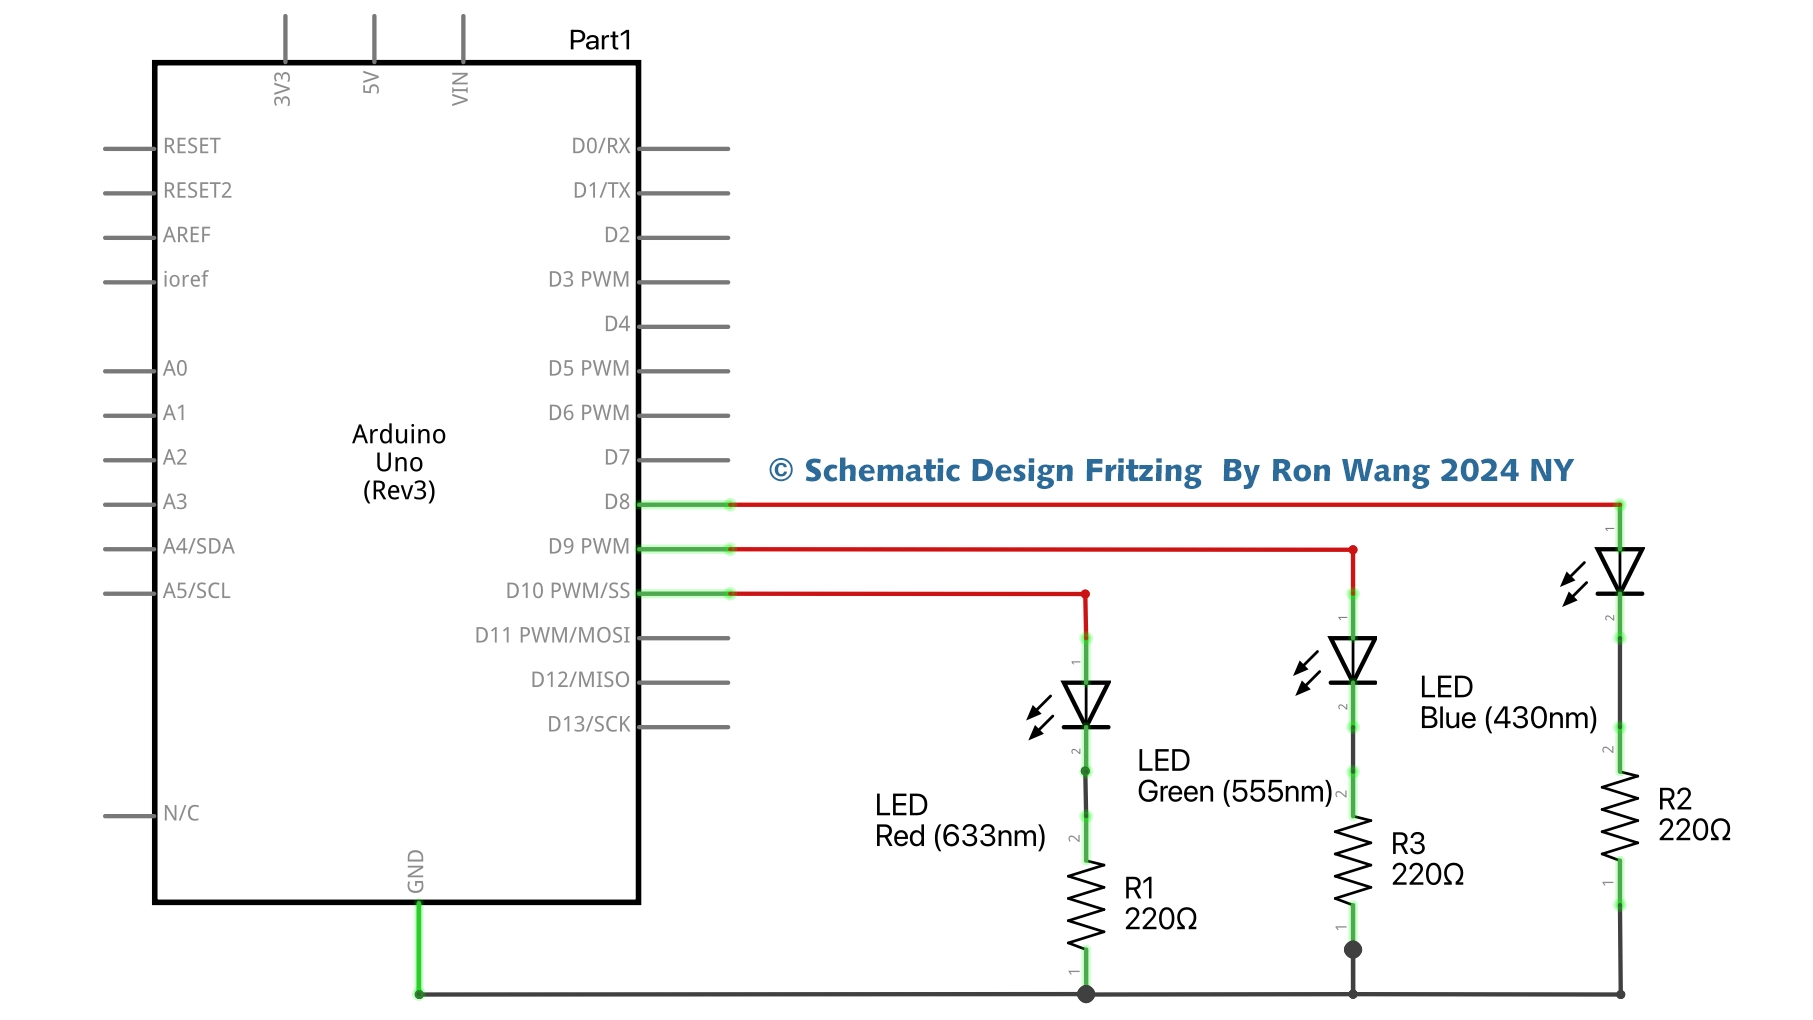
/* Coding Ron Wang
   July 9th 2024
   Autaba support for coding hardware
 */
// Project 8 - Mood Lamp
float RGB1[3];
float RGB2[3];
float INC[3];
int red, green, blue;
int RedPin = 10;
int GreenPin = 9;
int BluePin = 8;
void setup()
{
 randomSeed(analogRead(0));
 RGB1[0] = 0;
 RGB1[1] = 0;
 RGB1[2] = 0;
 RGB2[0] = random(256);
 RGB2[1] = random(256);
 RGB2[2] = random(256);
}
void loop()
{
 randomSeed(analogRead(0));
 for (int x=0; x<3; x++) {
 INC[x] = (RGB1[x] - RGB2[x]) / 256; }
 for (int x=0; x<256; x++) {
 red = int(RGB1[0]);
 green = int(RGB1[1]);
 blue = int(RGB1[2]);
 analogWrite (RedPin, red);
 analogWrite (GreenPin, green);
 analogWrite (BluePin, blue);
 delay(100);
 RGB1[0] -= INC[0];
 RGB1[1] -= INC[1];
 RGB1[2] -= INC[2];
 }
 for (int x=0; x<3; x++) {
 RGB2[x] = random(556)-300;
 RGB2[x] = constrain(RGB2[x], 0, 255);
 delay(1000);
 }
} 版权声明:本文为原创文章,版权归donstudio所有,欢迎分享本文,转载请保留出处!


