Arduino Project 016 - L293D Motor Driver IC
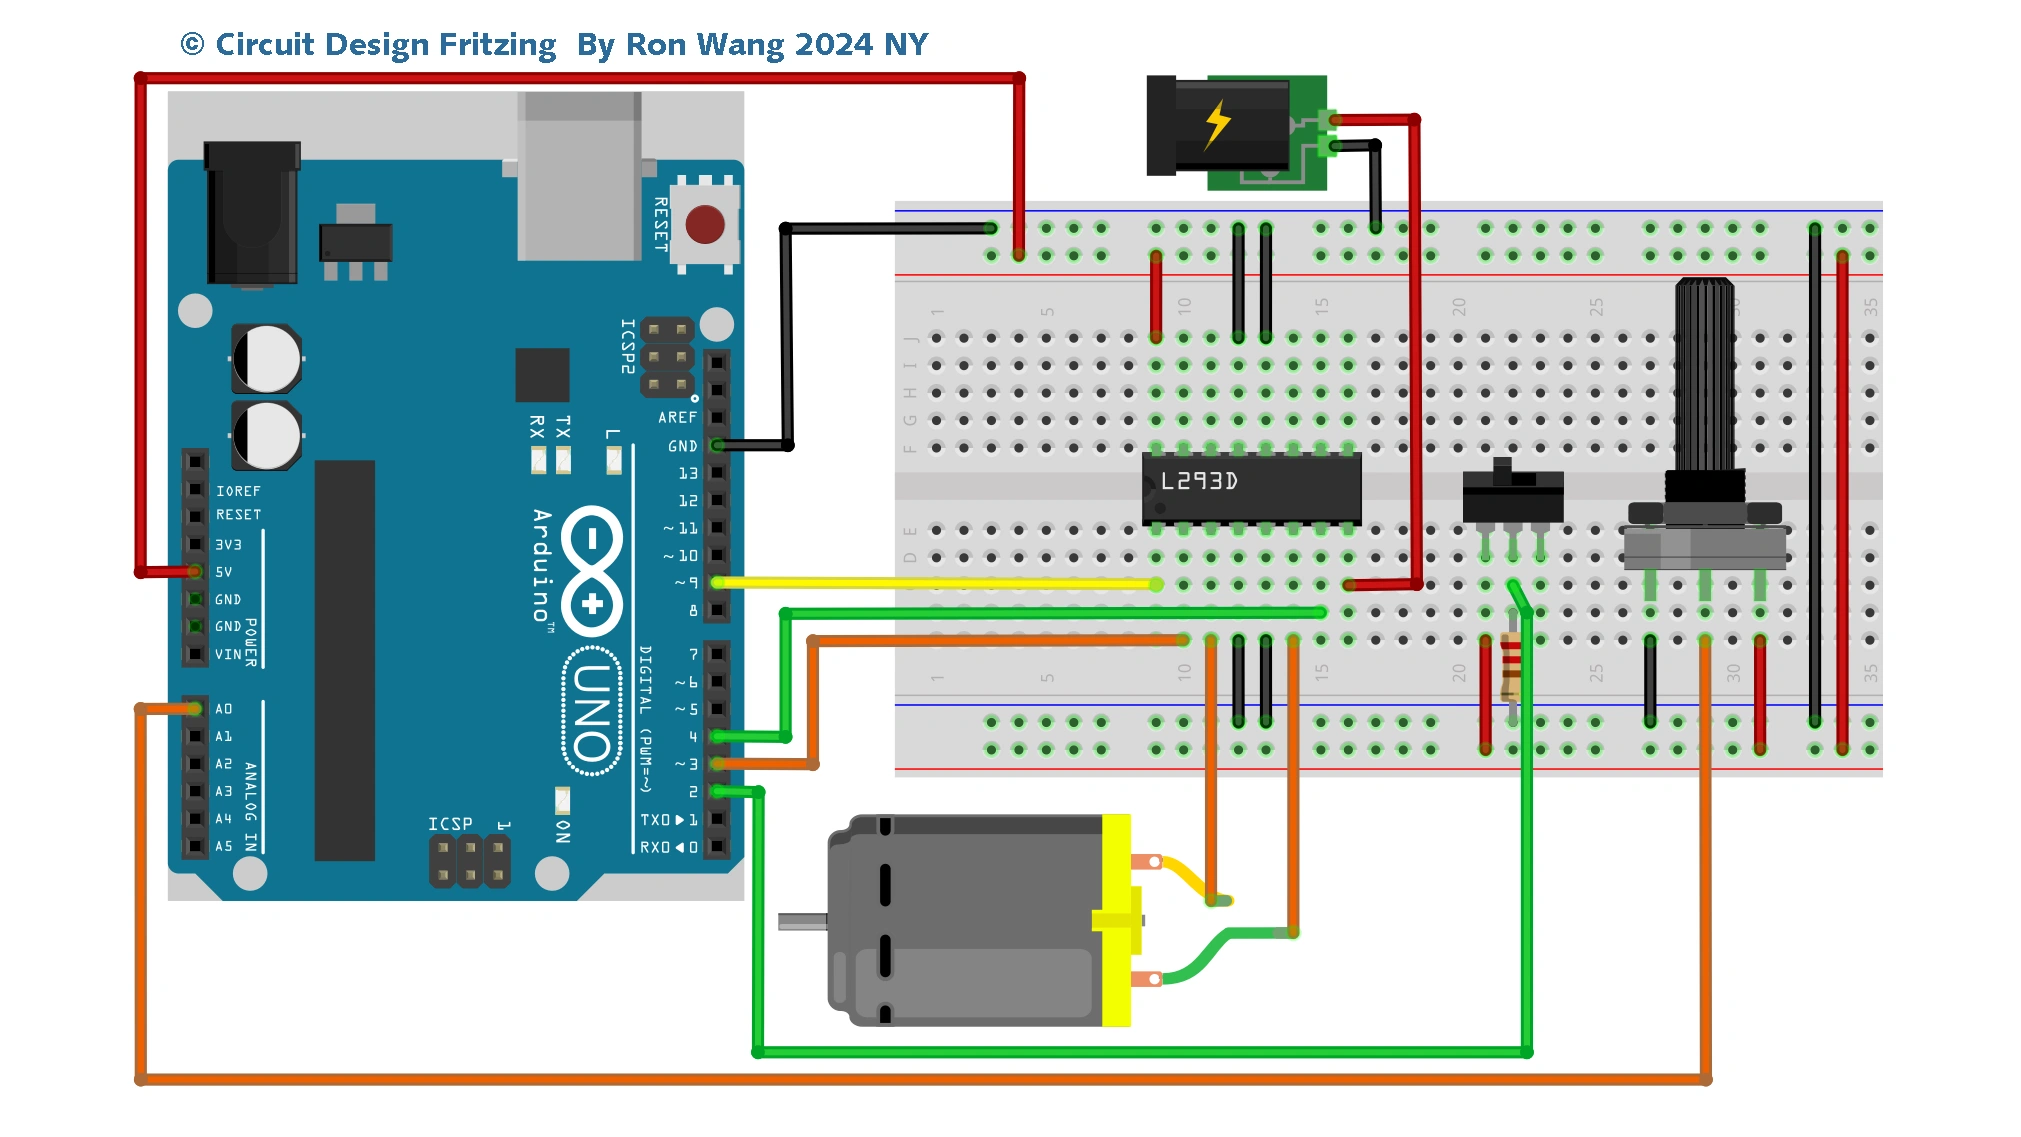
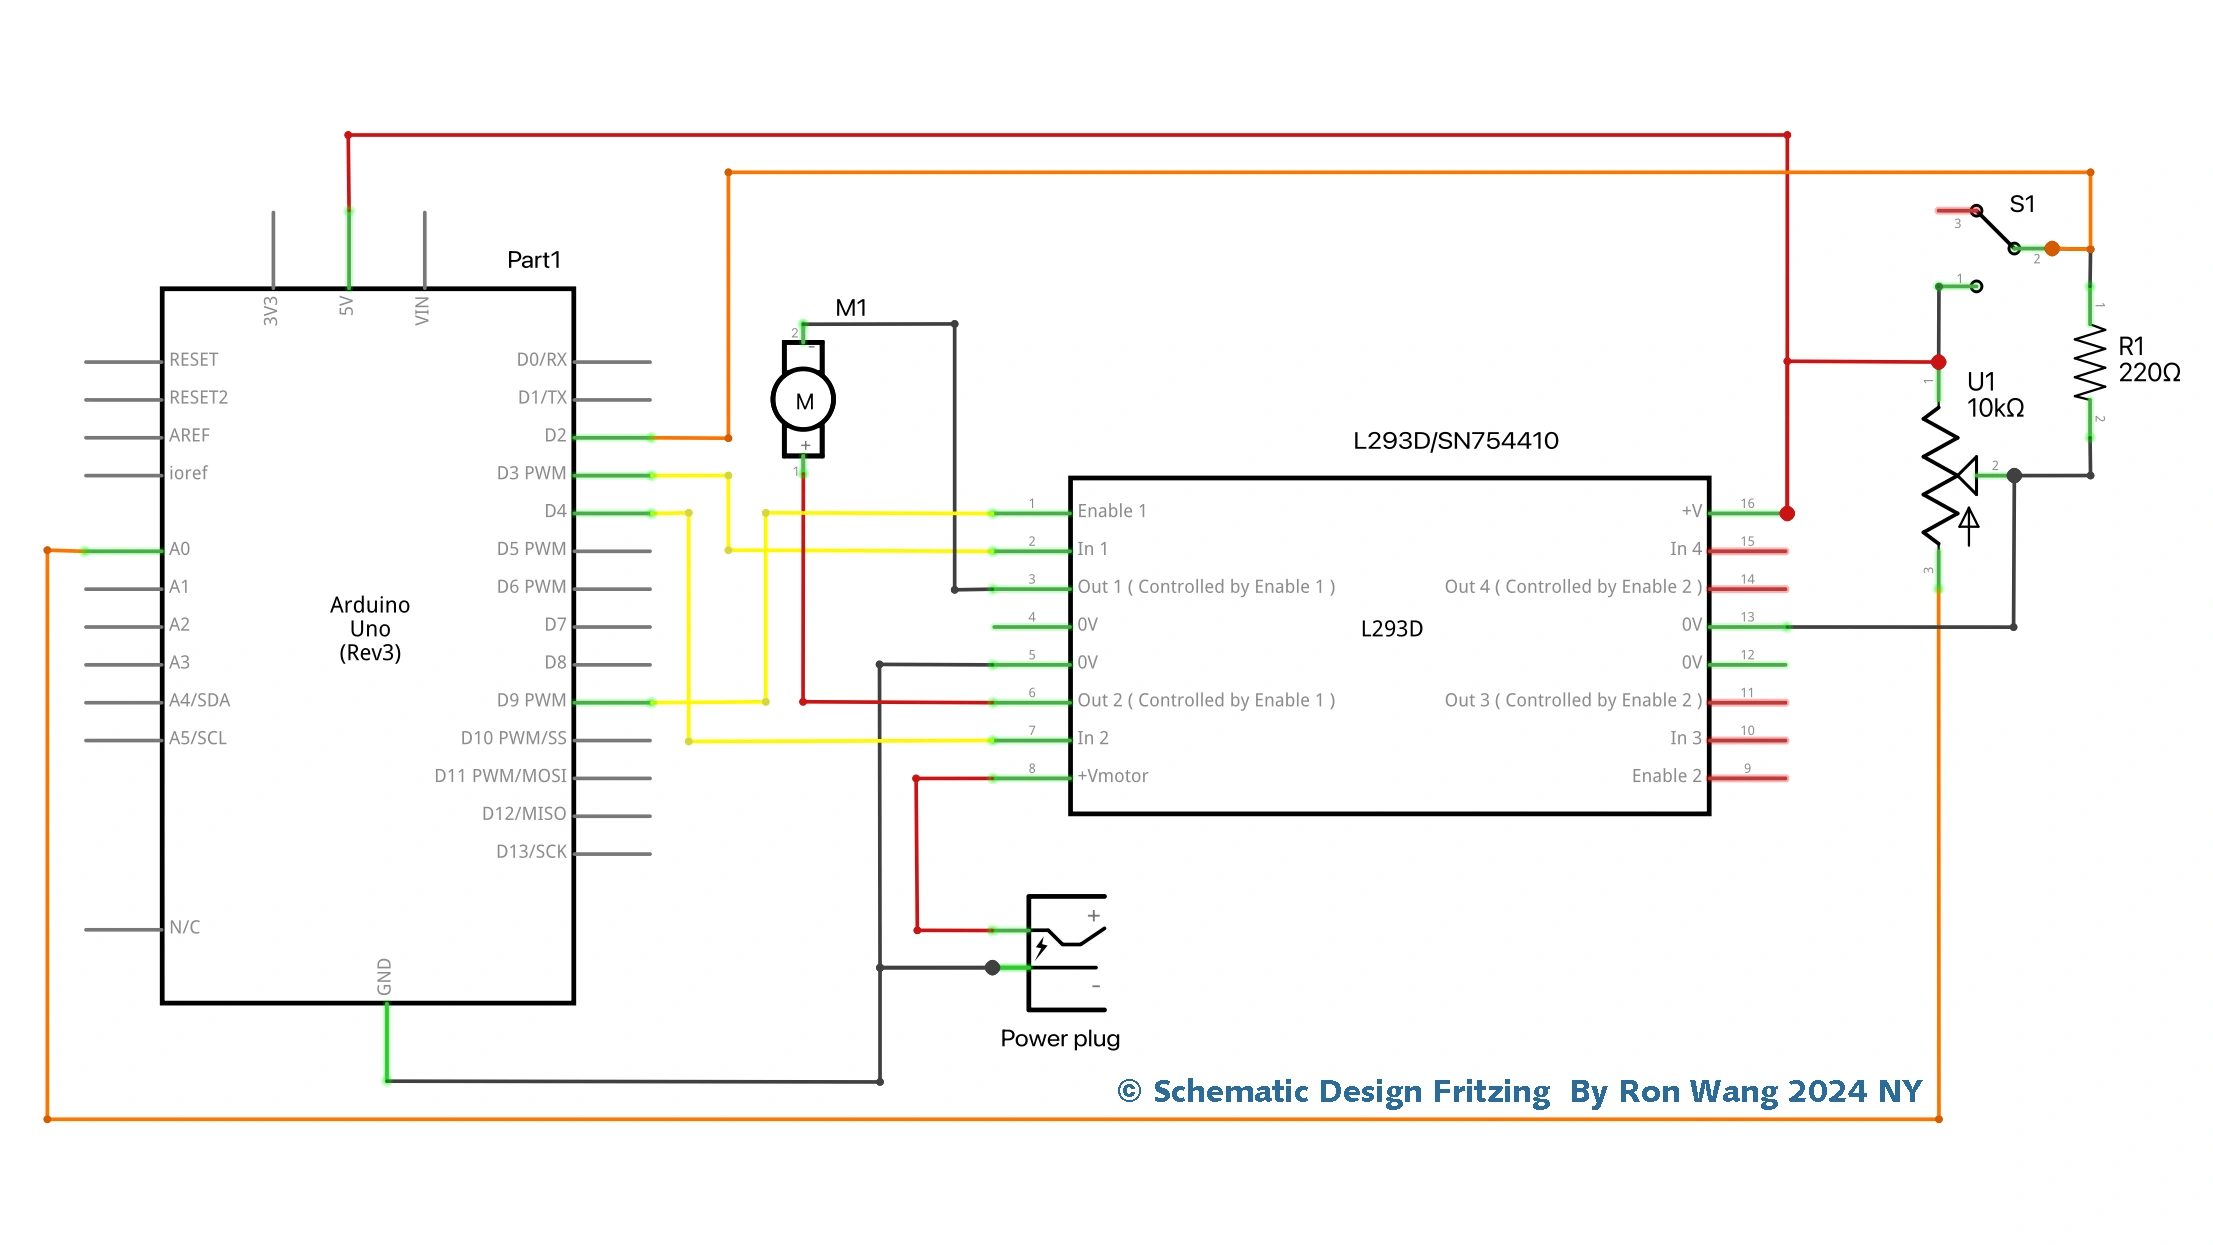
In the previous project, you used a transistor to control the motor. In this project, you are going to use a very popular motor driver IC called an L293D. The advantage of using this chip is that you can control two motors at the same time, plus you can control their direction. The chip can also be used to control a stepper motor, as you will find out in Project 28. (You can also use a pin-for-pin compatible chip known as the SN754410, which has a higher current rating.) Notice anything missing from the parts list Diodes, perhaps? Not to worry; the IC has its own internal diodes, so you do not need one for this project.
项目Project 16 Using an L293D Motor Driver IC
/* Coding Ron Wang
   Sep.3rd 2024
   Autaba support for coding hardware
 */
// Project 16 - Using an L293D Motor Driver IC
#define switchPin 2 // switch input
#define motorPin1 3 // L293D Input 1
#define motorPin2 4 // L293D Input 2
#define speedPin 9 // L293D enable Pin 1
#define potPin 0 // Potentiometer on Analog Pin 0
int Mspeed = 0; // a variable to hold the current speed value

void setup() {
//set switch pin as INPUT
pinMode(switchPin, INPUT);
// set remaining pins as outputs
pinMode(motorPin1, OUTPUT);
pinMode(motorPin2, OUTPUT);
pinMode(speedPin, OUTPUT);
}

void loop() {
 Mspeed = analogRead(potPin)/4; // read the speed value from the potentiometer
 analogWrite(speedPin, Mspeed); // write speed to Enable 1 pin
 if (digitalRead(switchPin)) { // If the switch is HIGH, rotate motor clockwise
 digitalWrite(motorPin1, LOW); // set Input 1 of the L293D low
 digitalWrite(motorPin2, HIGH); // set Input 2 of the L293D high
 }
 else { // if the switch is LOW, rotate motor anti-clockwise
 digitalWrite(motorPin1, HIGH); // set Input 1 of the L293D low
 digitalWrite(motorPin2, LOW); // set Input 2 of the L293D high
 }
}
版权声明:本文为原创文章,版权归donstudio所有,欢迎分享本文,转载请保留出处!


